Welcome to part 2 of my scrap quilting post.
I have decided not to do the sashing on this quilt as in the part 1 of this epic.
I had decided that this was going to be a Christmas present for my wife, Amanda. We both have “day quilts” which we use when we are sat in the house. Amanda’s first daily use quilt is over 12 years old now and made with the horrible polyester wadding. This has led to the fabric, all Christmas fabric by the way to become worse for wear. Having said that it has been used every day since it was made.
For me, making a present whist the receiving person, in this case, my wife is with me. For this quilt, I decided to include Amanda in the design without her knowing it was for her.
She helped pick the design, the number of rows, the longarm pattern, the backing fabric, and the binding fabric. All this was without her knowing it was for her. I do hold my hands up to being a crafty sod on this occasion but that’s the fun!!
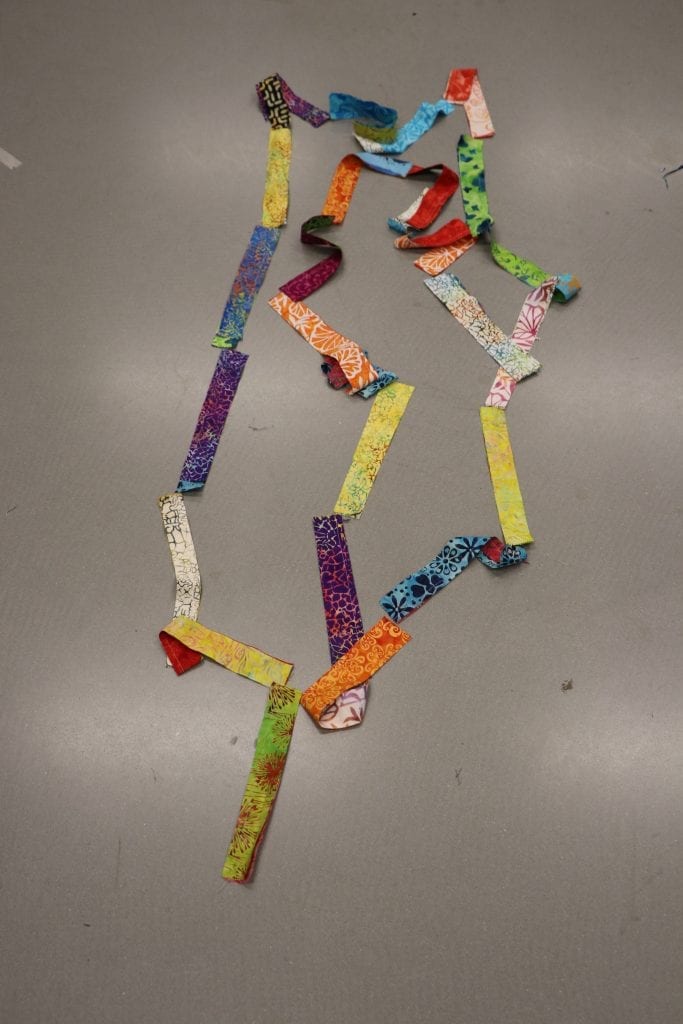
After I had sewn all the pieces of fabric together to form my Dr Who type scarf.

I had to do some serious chopping. The whole design was to be based on the rail fence design but with an Alan Teather Quilting touch.
Because I stitched all the pieces together on the long edge of the fabric it meant that some pieces were on the bias. Some pieces were a bit stretchy whilst others were incredibly thin. The aim was to have a geet long row of 30 ft of 10” strips sewn together to make said scarf. As it turned out a lot of it was 10” wide, whilst some were 9” wide and some 8” wide.

As this was the case I had to chop this long length into pieces that resembled the same sizes. All the 10”, 9” and 8” etc in the same bundle.
Because some were sewn on the bias and thus were liable to stretch, these were cut as well.

After this, I straightened one side of the fabric swatches and then cut the other side to get the maximum size out of each piece. This was ok for the 10’s and 9’s but the 8’s were too narrow.

So, the quandary was, do I go with cutting the 10’s into 2 x 5” blocks and the 9’s into 2 x 4.5” blocks and make the quilt top really irregular and totally scrappy or cut all of the pieces to 9” wide then sub-cut these to 4.5” blocks. That seemed the eminently sensible idea so that is what happened.

I just had the idea of placing each block opposite to the next so one 4.5” block would be horizontal and the next vertical.

The next vertical, the 4th horizontal, and so on. I felt the correct width of the quilt would be 7 blocks but Amanda thought 11 blocks wide x 17 long would be right.

I couldn’t disagree as it was her self designed Christmas pressent. I must say here that 7 blocks wide x 9 blocks long, 63 blocks in total would use up every block I had made. Going with Amanda’s design meant a shed load more work for me, 187 blocks or 124 blocks extra……. So, I got sewing again.
I had to as the original ruse was just to be a workshop idea and example for a future class but in reality, it was going to be a Chrimbo pressie I had to do more.
To do the original idea of the sashing would give me a larger quilt with less effort. That didn’t work! Amanda didn’t like the idea of sashing and preferred all the blocks to be sewn together direct. I had sewn 4 blocks together in ready to add the sashing but this had to be undone to make the rows.
So we are at the stage of sewing the blocks into rows of 11 x 4.5” blocks, starting with a horizontal block than a vertical block, repeated 6 times to make a row. The next row was to start with a verticle block.
It grew fast enough, bearing in mind it had already taken 3 weeks to do all the cutting and stitching. Amanda still didn’t cotton on that it was for her but it was to be a demonstration quilt for the wall of the shop.
Eventually all the blocks of 4.5” were sewn together in the correct way and made a nice looking really colourful quilt top. Amanda did say she would like to take it home but having it on the wall would make her smile every morning when she came in..
Being a tightwad I wanted to use the 8” pieces for something so with Amanda’s guidance we decided that these would be cut up into strips to make a border. So each of the 8” pieces were cut and sewn into a long strip of fabric 346” long by 2” wide.
This was then attached to the quilt top to form a batik border to the quilt top. To this, some Robert Kaufman Fusions yellow fabric was used for the backing and binding. This was a choice because it was a surplice piece off the end of the roll that was matched together. It wasn’t really big enough to sell so it would have gone into my scrap box or tutorial box o’ bits. By using this it was a nod to the idea of wasting nothing.
Wadding used was a Bleached white 100% cotton that I stock as this would enable the colours to be lifted up as opposed to being dulled down if I had used the cream or black versions of wadding I sell.
As we quilters know, a quilt is the sum of the parts and is not finished until it gets quilted. So on the longarm, it went and I suggested to my wife a number of really way out quilt designs such as honor and valor or 3 tour designs, all from the American military so, hopefully, she would say no and then pick a design she liked. Sly, I know but there was a method in my madness.

It was right up to the end of the 23rd of December that I got it all finished including the hand stitching of the binding using hidden ladder stitch. We decided to be off for the 24th so I had to “go for some car fuel” before Christmas and whilst there I popped into the work unit and wrapped the quilt up for Amanda’s Chrimbo pressie.


All in all, it was 217 hrs and 41 minutes to make the quilt so work out its worth as per your own cost ratio. I was well paid with the reaction and the few odd expletives from Amanda, yes she swears at me, on Christmas day when she opened the box and saw the quilt.

This is being used every day since the 25th. I say it’s because she loves all the work and hours I put into it that makes her want to use it every day….
Amanda would say it’s because I only put the heating on at 14 Degrees C…
Oh well……
Alan.